
Managing Documents on a Contact Record
The Documents tab keeps a contact's files, contribution statements, and sent receipts organized in one location. You can upload documents, search and categorize files, generate contribution statements, and access previously sent receipts.
💡 Good to Know: Navigate to MaxGiving CRM > Supporters > Individuals. Select a contact to open their full profile, then click the Documents tab.
Viewing and Uploading Documents
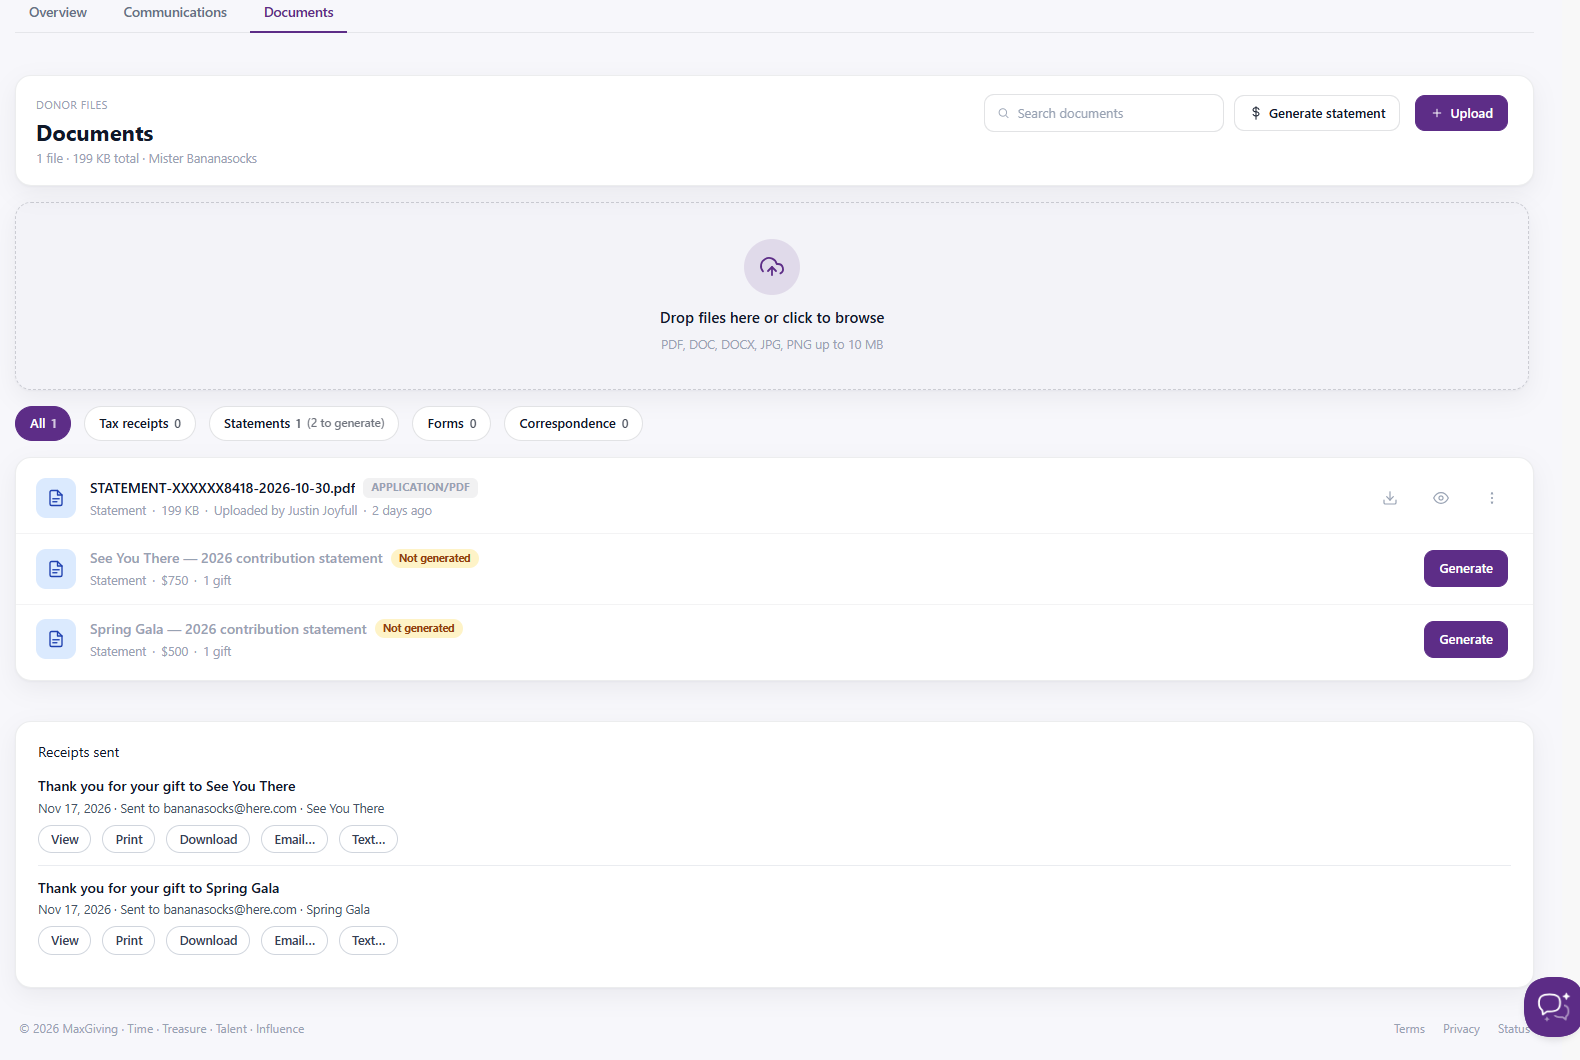
The Documents tab displays the contact's stored files and total document storage.
From this page you can:
- Search Documents: Find an existing document.
- Generate Statement: Create a contribution statement for an event associated with the contact.
- Upload: Add a document to the contact's profile.
- Drag and Drop: Upload a file directly into the document area.
To upload a document:
- Click Upload, or drag and drop a file into the upload area.
- Select the document you want to upload.
- Complete any additional prompts to finish uploading.
💡 Good to Know: Supported file types include PDF, DOC, DOCX, JPG, and PNG, with a maximum file size of 10 MB.

Organizing Documents
Below the upload area, documents are organized into categories:
- All: View all stored documents.
- Tax Receipts: View documents categorized as tax receipts.
- Statements: View generated or uploaded statements.
- Forms: View documents categorized as forms.
- Correspondence: View correspondence files.
Each uploaded document displays available information, including its filename, file type, category, size, and upload details.
From a document record you can:
- Download: Click the download icon to save the file to your computer.
- View: Click the eye icon to open the document.
- More Options: Click the three-dot menu to change the document's category or delete it.
Moving or Deleting a Document
- Locate the document you want to manage.
- Click the three-dot menu.
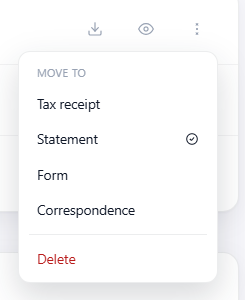
- Under Move To, select Tax Receipt, Statement, Form, or Correspondence to change its category.
- To remove the document, select Delete.
⚠️ Important: Only delete documents you no longer need. Confirm that the correct file is selected before deleting it.
Generating Contribution Statements
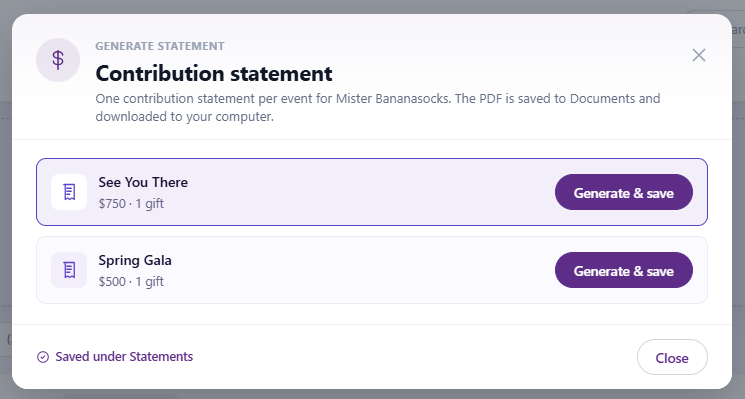
Contribution statements summarize a contact's recorded contributions for an individual event. The CRM provides a separate statement for each event with eligible contributions.
- From the Documents tab, click Generate Statement.
- In the Contribution Statement popup, locate the event you want.
- Review the contribution amount and number of gifts displayed.
- Click Generate & Save next to that event.
- Repeat for additional events if needed.
- Click Close when finished.
The generated PDF is automatically saved under Statements in the contact's Documents tab and downloaded to your computer.
You can also generate an available statement directly from the document list by clicking Generate beside a statement marked Not generated.
Reviewing Receipts Sent
The Receipts Sent section appears below the document list and displays receipts previously emailed to the contact.
Each receipt includes its description, date sent, recipient email, and associated event.
From this section you can:
- View: Open the receipt.
- Print: Print a copy.
- Download: Save the receipt to your computer.
- Email: Access the option to email the receipt.
- Text: Access the option to send the receipt by text.
[Screenshot: Receipts Sent section showing receipt information and action buttons]

Helpful Tips for Document Management
To keep your organization's CRM records organized, we recommend:
- Uploading documents directly to the appropriate contact record.
- Using descriptive document names so files are easier to locate.
- Assigning documents to the correct category.
- Reviewing existing documents before uploading duplicates.
- Periodically reviewing contact documents to ensure records remain current.
Good to Know: Documents are stored within the individual contact's profile, making it easier for your team to locate important files when reviewing a donor or supporter relationship.
Keeping documents organized helps your team maintain accurate records and access important information when it is needed.