
Adding Photos or Videos to Your Site
Photo and video suggested file types:
- The best photo file formats: jpg, jpeg, png, gif
- eps files are not supported
- PDF files might work, but often will not work on all devices or browsers, so it is recommended to stick with other file formats. ***PDF and TIFF files can NOT be used for organization logo, as it will cause an issue when pulling that file to create the PDF statements.
- The best video file format: mp4 (even better, to help with site loading times, we suggest you use YouTube or another platform to add videos using the URL method).
- MOV files might work, but often will not work on all devices or browsers, so it is recommended to stick with mp4 formats.
- Here is a free file converter resource available online for converting MOV files to mp4: https://www.freeconvert.com/mov-to-mp4
- MOV files might work, but often will not work on all devices or browsers, so it is recommended to stick with mp4 formats.
Photo and video suggested file size and dimensions:
-
Image File Size should not be larger than 10MB, however to optimize site performance and load times, we suggest file sizes less than 100KB. The platform will auto-compress images file to help optimize resolution while keeping image quality.
**These are just suggestion we recommend you see what you like the look of.
- Video File Size should be less than 500MB, so this depends more on the resolution or video quality than the length of time the video plays.
- Organization Logo Dimensions: 150px x 150px
- Website Banner Dimensions:800px x 200px ***Custom dimensions are available, contact our support team for assistance.
- Sponsor Logos Dimensions: 300px x 300px
-
Auction Items and Item Sales Image Dimensions: 4:3 ratio
**These are just suggestion we recommend you see what you like the look of.
(for example 800px x 600px)

Photo or Video Upload:
There are many times during your setup you will need to upload/add an image. 1. To add an image, click on the Upload button. When the pop up opens you have a few choices of where you can get your photos/video. You can simply drag and drop it into the popup or ...

a. My Files: Get a photo from your files on your computer.
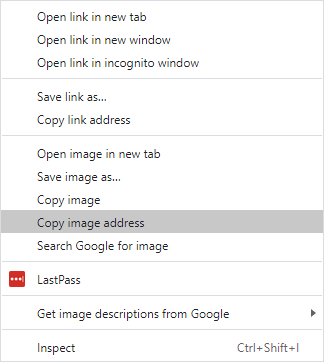
b. Web Address: Get your photo from a Public URL or from a file on the web. You can locate this URL by right clicking on any image on a website and selecting “Copy image address.” You can then paste this in the field to use the desired image directly from its web address.
c. Camera: Use your phone or Ipad (with a camera) to capture and instantly upload a photo.
d. Image Search: Search the web using Google to find a photo for use. ** In this search you can choose to only show photos with certain usage rights.
e. Dropbox: You can connect your DropBox to the platform and get your photos straight from there.

2. Once you have uploaded your photo into the photo pop up.
a. The system will automatically show you a crop based on the dimensions for the space the photo will be uploaded.
b. If you prefer to crop and better position the image, position the box to your satisfaction and click Crop.
c. The crop will only allow dimensions for the space allocated for the photo, so to include the full original image, click Skip. It will pad the image with white space so that it fits into the assigned space, but not skew the image to fit properly.
Bulk Auction Item Image Upload:
You can use this feature to upload all of your Auction Item Photos at once. For step by step instructions on how to do a Bulk Auction Item Upload Click here: https://maxgiving.helpscoutdocs.com/article/44-bulk-auction-item-image-upload
Printable Quick Help Guide:
(see below for printing instructions)

How to Print This Guide
- Right-click on the image of the guide
- Select Save Image As…
- Save the file to your computer
- Open the saved image
- Click Print (or use Ctrl + P / Command + P)
💡 Good to Know
For best results, print using Full Page or Fit to Page settings to ensure proper sizing and clarity.