
Adding Items for Sale (Multi Sale Items)
Multi-sale items allow you to sell multiple quantities of the same item (such as raffle tickets, games, or merchandise).
1. Open Items for Sale
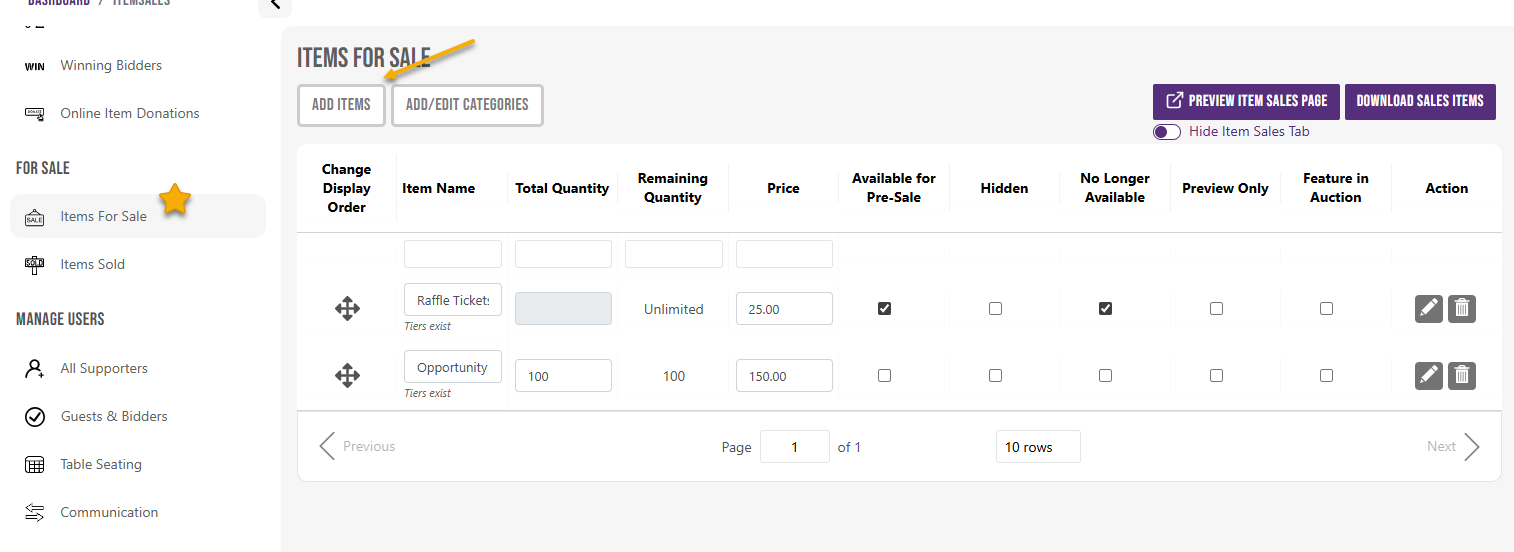
- Go to For Sale
- Select Items for Sale
- Click Add Item

2. Enter Basic Item Information
At minimum, enter:
- Item Name
- Price (cost of the item)
- Quantity Available
Optional fields:
- Photo
- Description
- Donor Contact (not required for most multi-sale items)
- Display Name
3. Set Fair Market Value
Enter the fair market value.
💡 Good to Know
- For items like games or raffle tickets, this is typically the same as the price
- Confirm with your accountant if needed
4. Limit Quantity Per Purchase
Set a limit on how many items one guest can purchase.
Example: limit to 3 for games like heads/tails or 52-card pickup
5. Set Options
- Enable Available for Pre-Sale if guests can purchase before the event
- Use Hide to keep the item from being visible
- Use No Longer Available if you are done selling this item.
- Use Preview Only to display without allowing purchase
- Feature will include this item on the bidding page if using mobile bidding
- Select Hide Purchase History if you do not want buyer names displayed.
- Unlimited will allow you to sell an infinite amount of this item.
- Raffle Ticket Option (Optional) Enable this option if the item is being sold as raffle tickets.
- Select Available at Checkin if you want to sell via the Check-In Menu.
6. Apply Sales Tax and Buyer’s Premium (Optional)
- Select a Sales Tax rate if applicable
💡 Good to Know: Sales tax must be set up in General Settings to appear as an option
10. Save the Item
- Click Submit to save the item
💡 Good to Know
- Multi-sale items are ideal for games, raffles, and merchandise
- Quantity and limits help control availability and fairness
- Items can be edited at any time after saving
⚠️ Important
Always click Submit to ensure the item is saved.
Printable Quick Help Guide:
(see below for printing instructions)
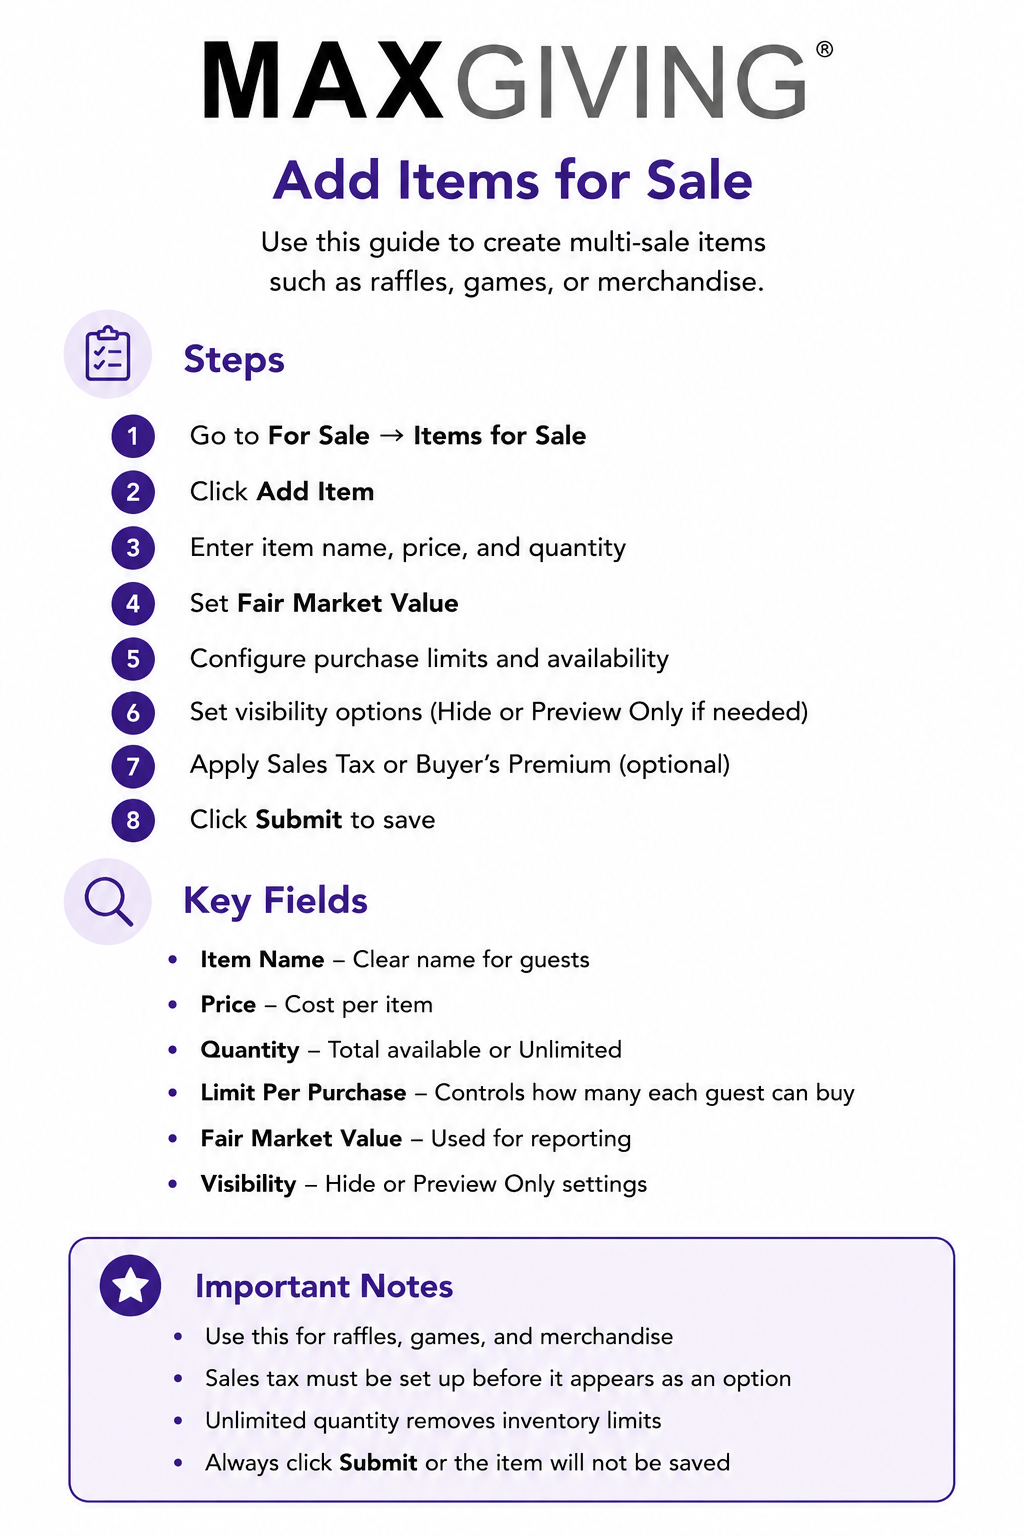
How to Print This Guide
- Right-click on the image of the guide
- Select Save Image As…
- Save the file to your computer
- Open the saved image
- Click Print (or use Ctrl + P / Command + P)
💡 Good to Know
For best results, print using Full Page or Fit to Page settings to ensure proper sizing and clarity.