
Adding Offline Reservations
Add reservations for guests who are purchasing and/or paying outside of the platform.
1. Check for Existing Supporter

- Go to All Supporters
- Search for the guest (business or individual)
- If found click pencil to open the guest record
- Once in guest record use drop down to select RSVP type
- Now Skip to step 5
2. Add a New Contact (If Needed)

If the guest is not found:
- Click Add a Contact
- Check your Supporters Database (if applicable)
- If still not found, click Create New Contact
- Enter:
- Name (business or individual)
- Phone number
- Click Save
3. Select RSVP Level

- Choose the appropriate RSVP level (example: paid guest, couple ticket, table, volunteer)
4. Answer Registration Questions

- Enter responses to any registration questions. IMPORTANT If you have not enabled registration questions, this portion will not appear.
- If unknown, click Skip
5. Save the Reservation

- Click Save Answers
If the selected RSVP level includes multiple tickets, you will be prompted to:
-
Yes, I will specify guests now: Add guests individually using available options (existing supporters, database, new contact, or TBD)
-
Yes, Assign all guests TBD: Assign all tickets to placeholder guests
-
Do not add guests for reservation: Skip assigning guests at this time
⚠️ Important: Be careful when skipping guest assignment to avoid missing guests later.
6. Process Payment

- Go to Event Statements → Statements and Payments
- Select Balance Due
- Click the statement (dollar sign) icon next to the guest
- Click Enter Payment
- Enter payment details (example: check number)
- Submit payment
💡 Good to Know
- Offline reservations allow you to track guests who paid outside the system
- Guests can be added or updated later
- Payments must be entered manually for offline reservations
⚠️ Important
Always complete the payment step to ensure the reservation is fully recorded.
Printable Quick Help Guide:
(see below for printing instructions)
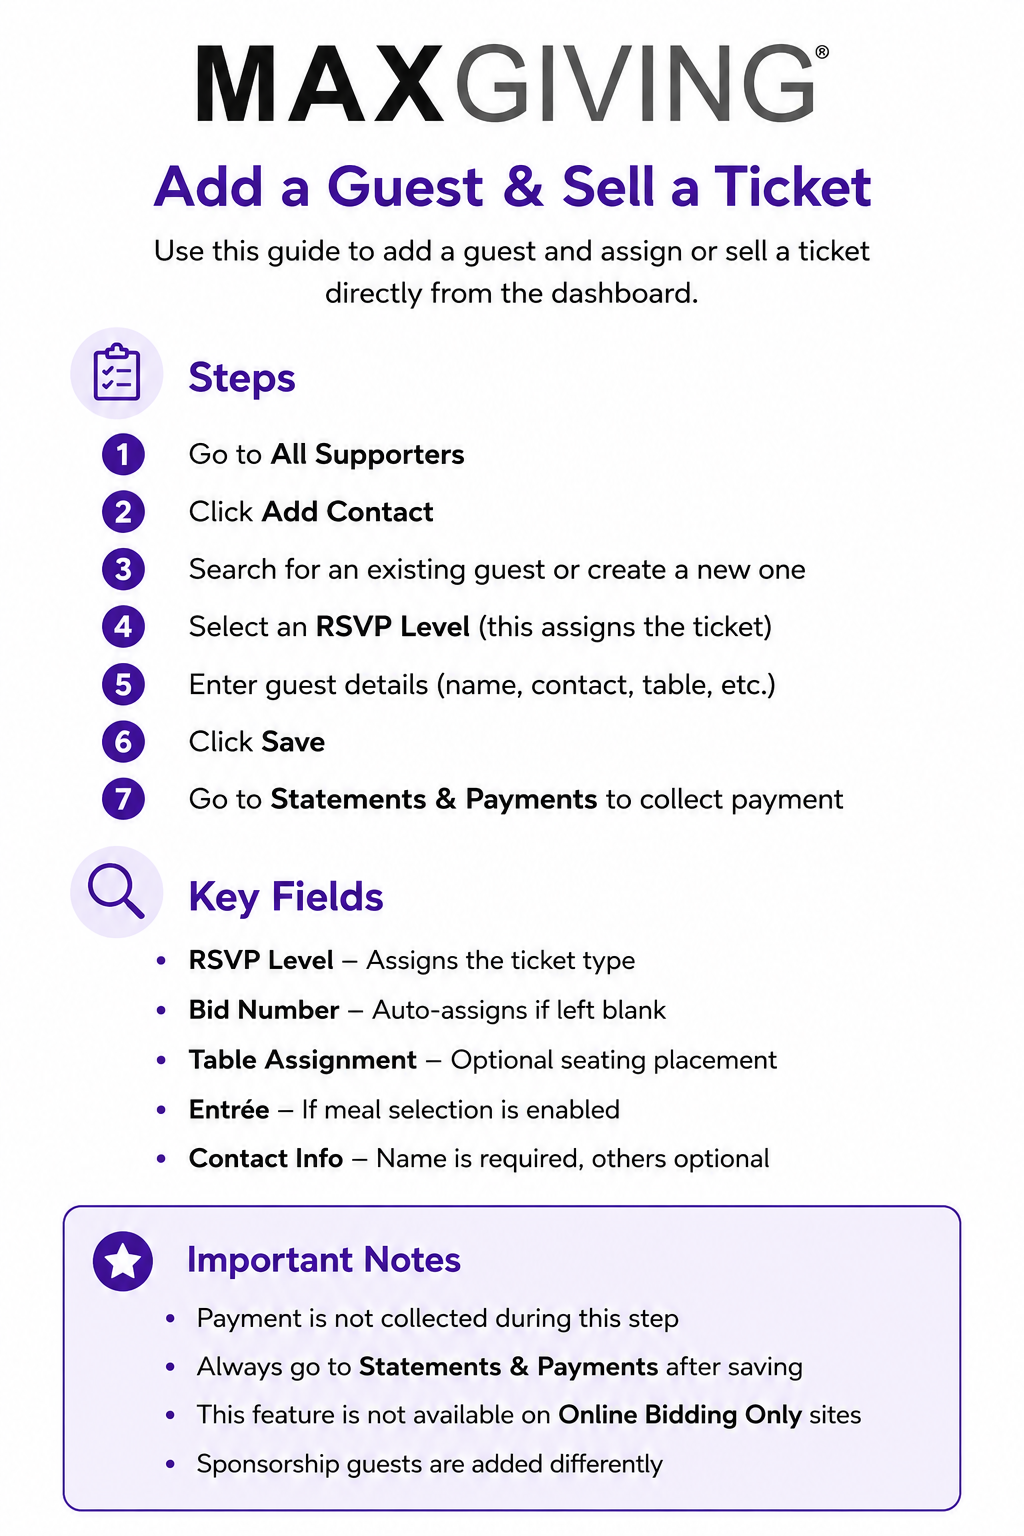
How to Print This Guide
- Right-click on the image of the guide
- Select Save Image As…
- Save the file to your computer
- Open the saved image
- Click Print (or use Ctrl + P / Command + P)
💡 Good to Know
For best results, print using Full Page or Fit to Page settings to ensure proper sizing and clarity.